


Getting Started with NoFi


Ian Hansborough
8 min. read · 09/08/2023
A practical guide to getting NoFi up and running in your workspace.
Welcome, Notion enthusiasts! In part one of our NoFi tutorial series, we'll walk you through the complete setup process for our NoFi finance template; a powerful Notion template that seamlessly integrates with your financial data. Whether you're managing your personal finances, running a side hustle, or even a small business, Nofi's template can be tailored to meet your specific needs. Join us on this journey as we walk you through the process of setting up your Nofi account and getting finance data into your Notion workspace. Looking for a more advanced tutorial that covers template customizations and workflows? Stay tuned for part 2, coming soon!
Setting Up Your NoFi Account
To start your NoFi journey, you first need to set up your NoFi account. Begin by signing up, just like John, our example user. Use your own email and password, and you're good to go.
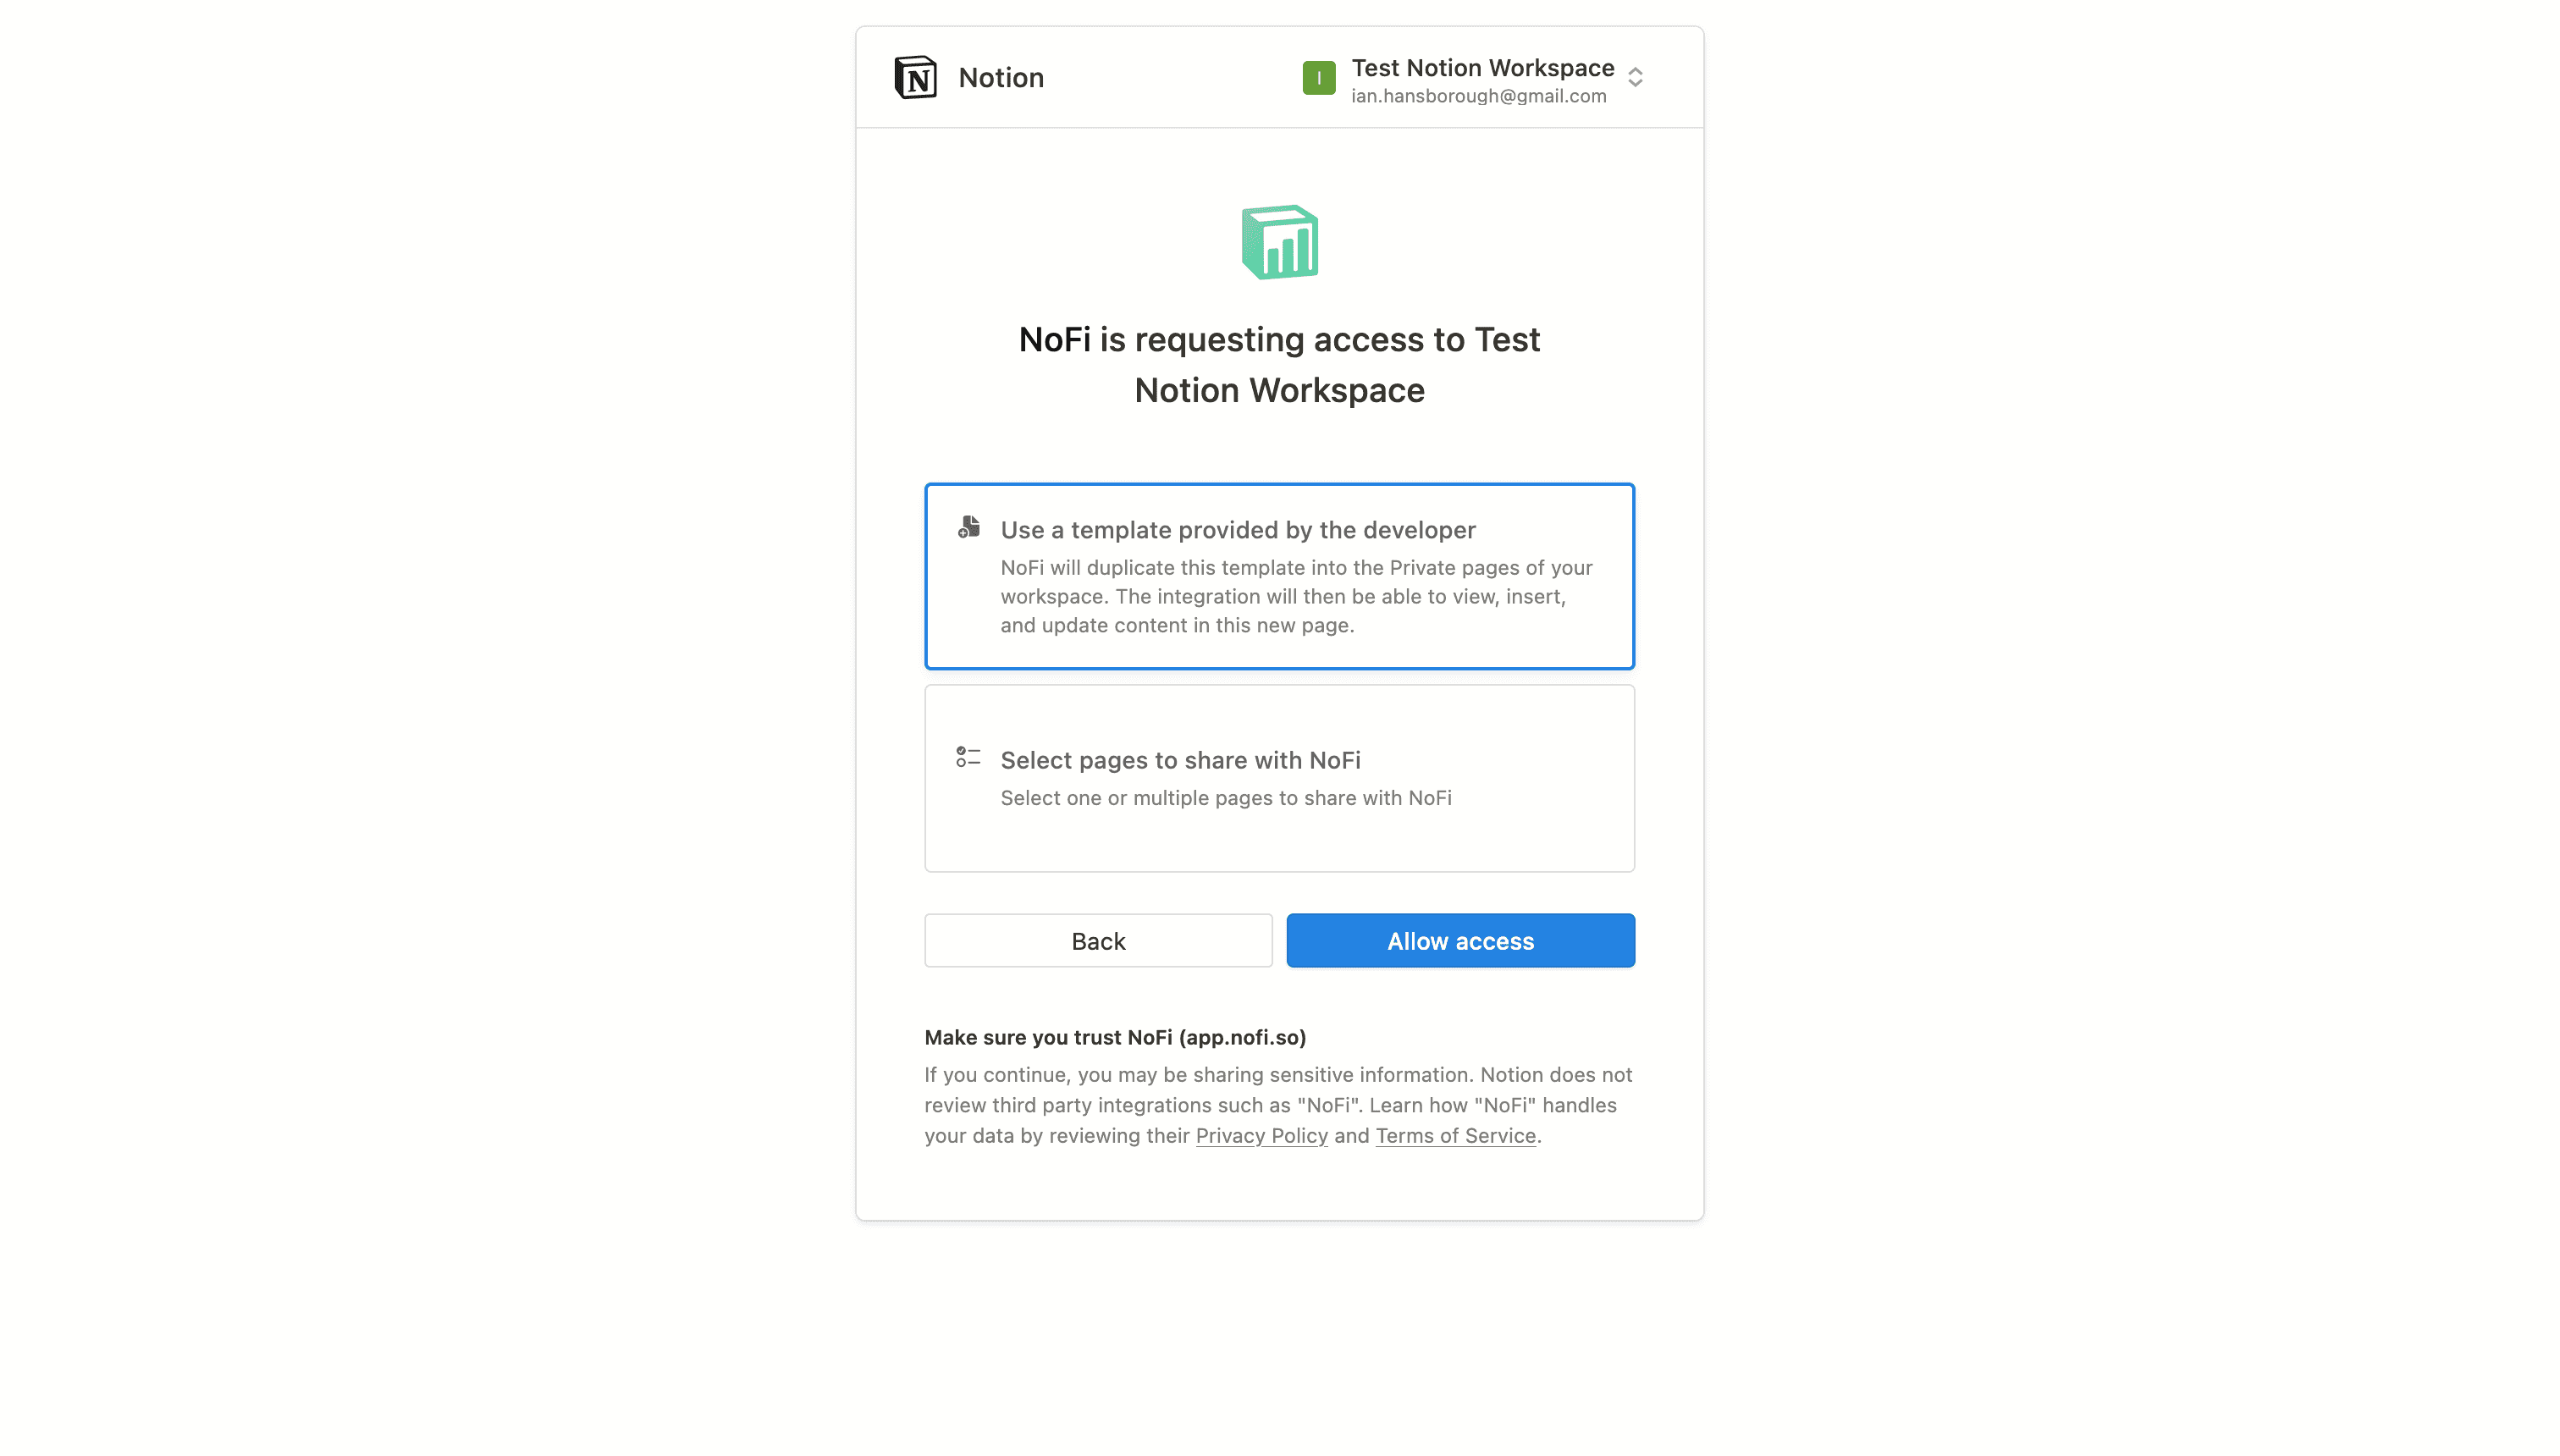
Choosing the Right Template
Now you may opt to either use a template provided by the developer or share NoFi with a custom set of pages already in your workspace. For most users, using the developer provided template is the way to go. Opting for this choice clones the default NoFi template into your workspace automatically. The template cloning / workspace setup does take a couple minutes to complete, so be patient :).
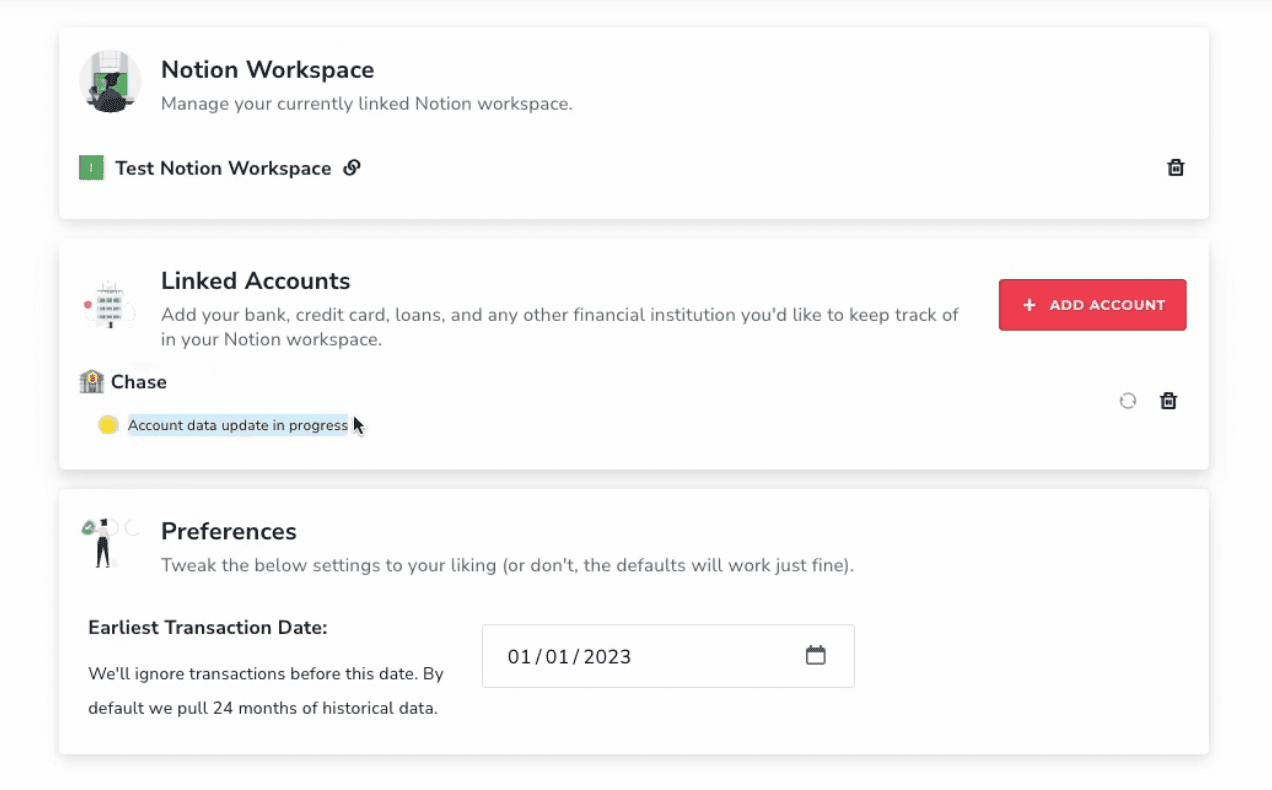
Fine-Tuning Your Preferences
Before diving into financial data integration, it's important to set your preferences. Pay close attention to the "earliest transaction date." This setting ensures your workspace remains clutter-free, showing data only from your specified date onward. Keep your workspace neat and efficient, displaying only the information that matters to you.

Linking Your Financial Accounts
With your preferences in place, it's time to link your financial accounts to NoFi. The process is secure and straightforward. We partner with Plaid for our banking auth. Once your account is linked, NoFi will work its magic, and start pulling your financial data into your Notion workspace.
Navigating Your NoFi Dashboard
Upon successfully linking your accounts, you'll land on your NoFi dashboard. Here, you can monitor the progress of data updates, remove accounts if necessary, and even add new ones. The dashboard also provides a direct link to your Notion workspace, making it easy to switch between the two. Each account that you have linked in your NoFi dashboard will sync data to your workspace automatically.
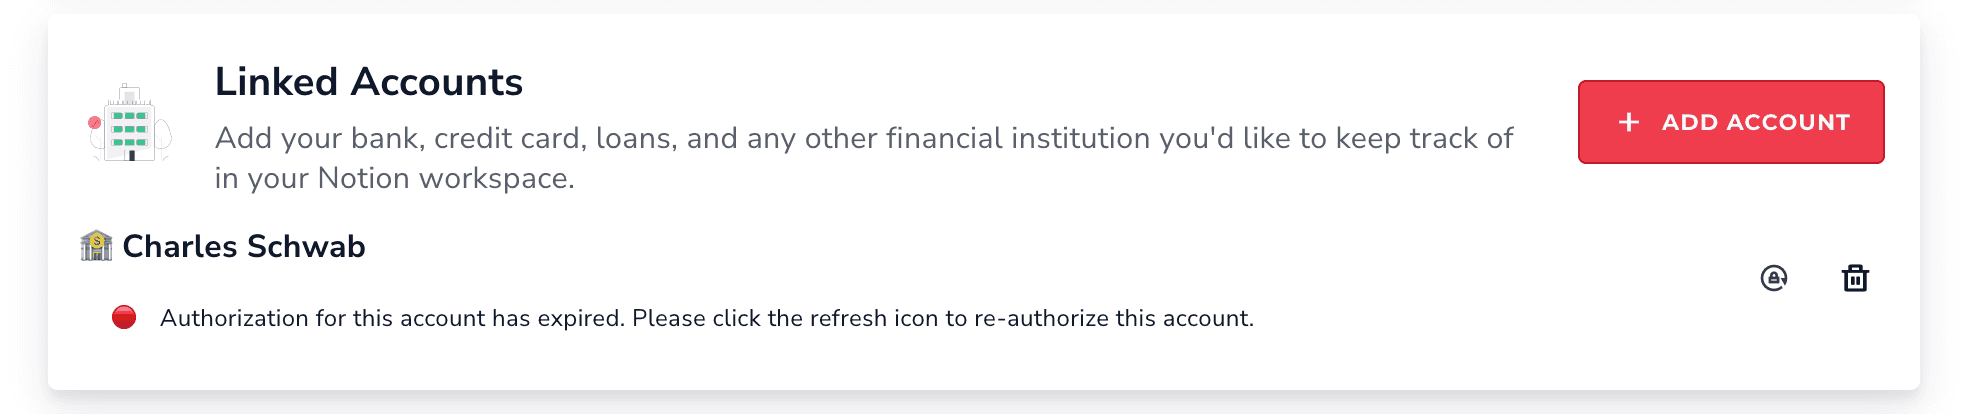
Dealing with Expired Auth
If you ever notice that data is not showing up in your template when you expect it should be, checking in with your NoFi dashboard is a great place to start investigating. Specifically, some banks will periodically "expire" your session and require you to log in again in order for NoFi to continue syncing data. You can do this by clicking the "re-authorize" icon next to that account on your NoFi dashboard.
Navigating your NoFi Template
Let's now shift our attention over to the NoFi template. Hopefully by now you're seeing some data from your linked accounts show up. In this tutorial, We'll cover the basics of what this template has to offer. Stay tuned for part 2 of this tutorial, where we will go deeper on the specifics of template customizations and useful workflows.
Reviewing Transactions
One of the key functionalities of NoFi is transaction management. This section allows you to review and categorize transactions efficiently. By assigning appropriate categories to your transactions, you can keep a close eye on your spending habits. Take advantage of Notion's batch select feature, a time-saving tool for reviewing many transactions simultaneously.
Monitoring Account Balances
The accounts section of our template will show all of your linked account information, including up-to-date balances!
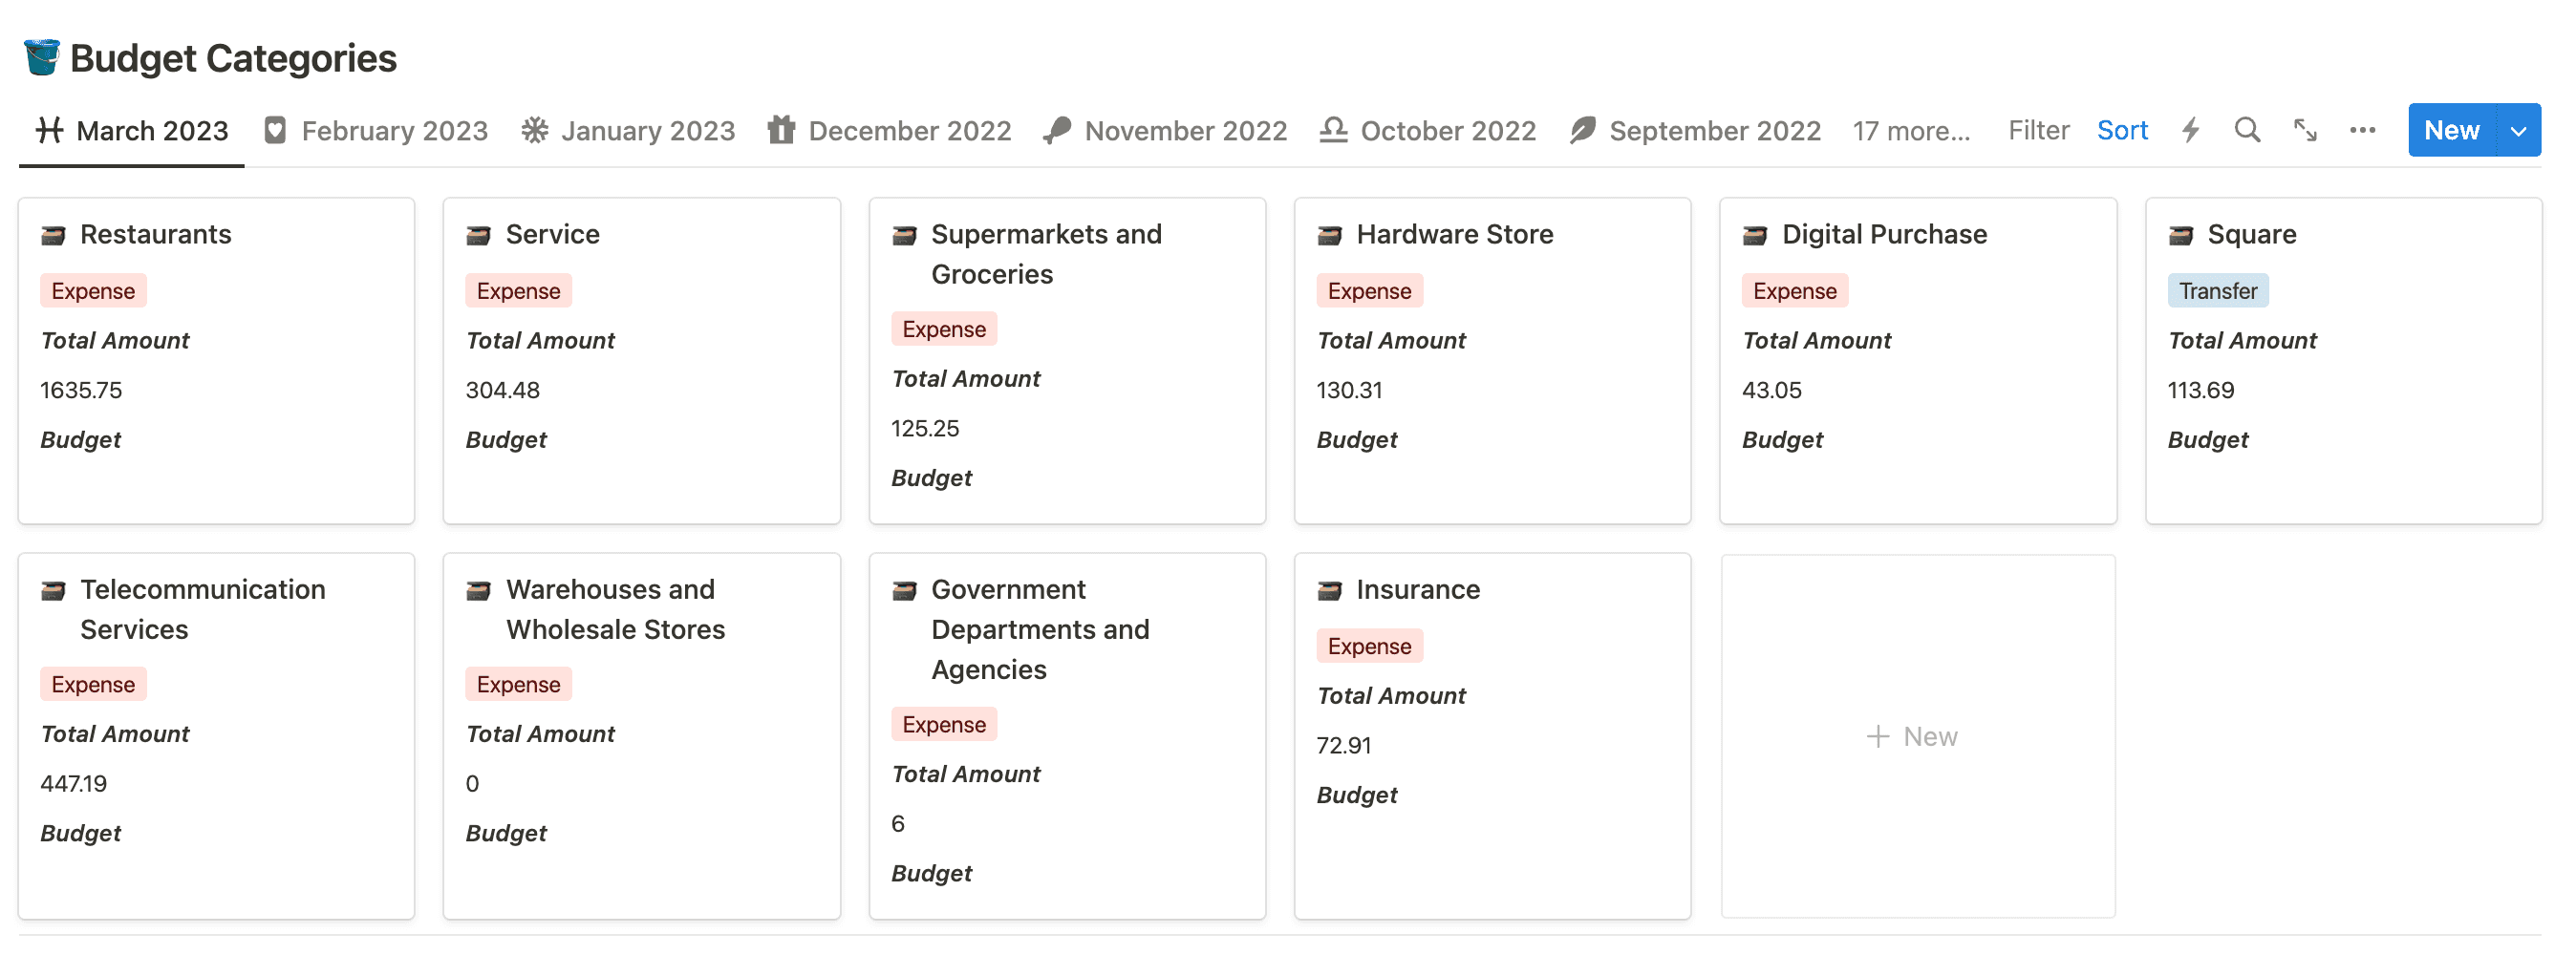
Budget Categories
We'll touch breifly on the budget categories section of this template as well. These category pages allow you to track your expenses, income, and transfers by category. NoFi will create some categories for you but you can also add custom categories to track your finances in a way that makes the most sense to you. We create database views for each month. The budget category cards displayed in this section of the template will reflect the budget of the selected database view's year/month. For example, in the screenshot below we have selected the "March 2023" database view. This means that the category cards will be showing properties that correspond to the user's March 2023 budget.
Monthly Summaries
Finally, we'll cover the montly summaries section. Monthly summaries provide a high-level overview of your financial activity over time. Use these summaries to monitor your expenses, income, and cash-flow month by month. The earliest transaction date ensures your summaries reflect your desired timeframe.
Conclusion
In this tutorial, you've learned how to integrate NoFi into your Notion workspace. You've set up your NoFi account, fine-tuned your preferences, linked your financial accounts, and learned to efficiently navigate your NoFi dashboard. Stay tuned for part two, where we'll explore advanced customizations to make your NoFi template truly your own. With NoFi, you're well on your way to a more organized and efficient financial management system in Notion. Thanks for joining us, and we'll see you soon for more tutorials and customization tips!
Contact Us


